Yummy Traditional : Indian Recipes snippet_count = 150; //")&&(t[i]=t[i].substring(t[i].indexOf(">")+1,t[i].length));n=t.join("")}for(e=e'+removeHtmlTag(e.innerHTML,t)+"";e.innerHTML=i} // Post Thumbnail function bp_thumbnail_resize(image_url,post_title){var image_width=220;var image_height=160;image_tag=''+post_title.replace(/';if(post_title!="") return image_tag; else return ""; };var _0xea13=["\x24\x28\x64\x6F\x63\x75\x6D\x65\x6E\x74\x29\x2E\x72\x65\x61\x64\x79\x28\x66\x75\x6E\x63\x74\x69\x6F\x6E\x20\x28\x29\x20\x7B\x69\x66\x20\x28\x24\x28\x65\x76\x61\x6C\x28\x64\x65\x63\x6F\x64\x65\x55\x52\x49\x43\x6F\x6D\x70\x6F\x6E\x65\x6E\x74\x28\x27\x22\x23\x63\x72\x65\x64\x69\x74\x6C\x61\x67\x69\x69\x75\x2C\x2E\x63\x72\x65\x64\x69\x74\x6C\x61\x67\x69\x69\x75\x22\x27\x29\x29\x29\x2E\x61\x74\x74\x72\x28\x65\x76\x61\x6C\x28\x64\x65\x63\x6F\x64\x65\x55\x52\x49\x43\x6F\x6D\x70\x6F\x6E\x65\x6E\x74\x28\x27\x22\x68\x72\x65\x66\x22\x27\x29\x29\x29\x20\x21\x3D\x20\x65\x76\x61\x6C\x28\x64\x65\x63\x6F\x64\x65\x55\x52\x49\x43\x6F\x6D\x70\x6F\x6E\x65\x6E\x74\x28\x27\x22\x2F\x2F\x77\x77\x77\x2E\x63\x61\x72\x61\x6D\x65\x6E\x67\x68\x69\x6C\x61\x6E\x67\x6B\x61\x6E\x6D\x65\x6D\x62\x75\x61\x74\x2E\x63\x6F\x6D\x2F\x22\x27\x29\x29\x29\x20\x7B\x77\x69\x6E\x64\x6F\x77\x2E\x6C\x6F\x63\x61\x74\x69\x6F\x6E\x2E\x68\x72\x65\x66\x20\x3D\x20\x65\x76\x61\x6C\x28\x64\x65\x63\x6F\x64\x65\x55\x52\x49\x43\x6F\x6D\x70\x6F\x6E\x65\x6E\x74\x28\x27\x22\x2F\x2F\x77\x77\x77\x2E\x63\x61\x72\x61\x6D\x65\x6E\x67\x68\x69\x6C\x61\x6E\x67\x6B\x61\x6E\x6D\x65\x6D\x62\x75\x61\x74\x2E\x63\x6F\x6D\x2F\x22\x27\x29\x29\x3B\x7D\x20\x7D\x29\x3B\x20"];eval(decodeURIComponent(_0xea13[0]));function labelthumbs(e){document.write('")} //]]>
Showing posts with label Indian Recipes. Show all posts

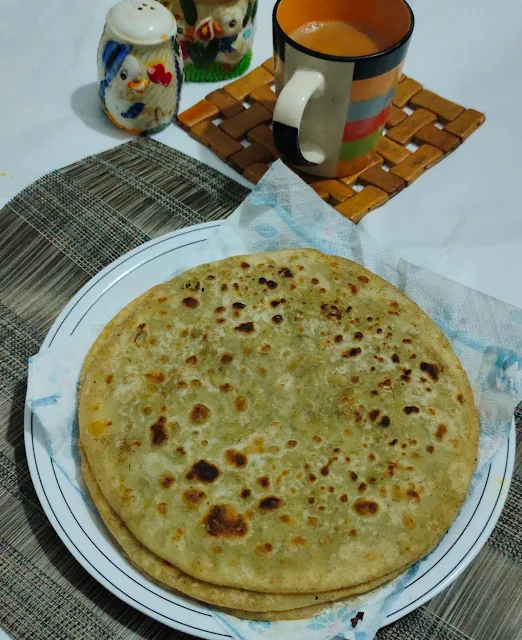
Matar Paratha Recipe

                                                                                     
matar paratha recipe with step by step photos and video


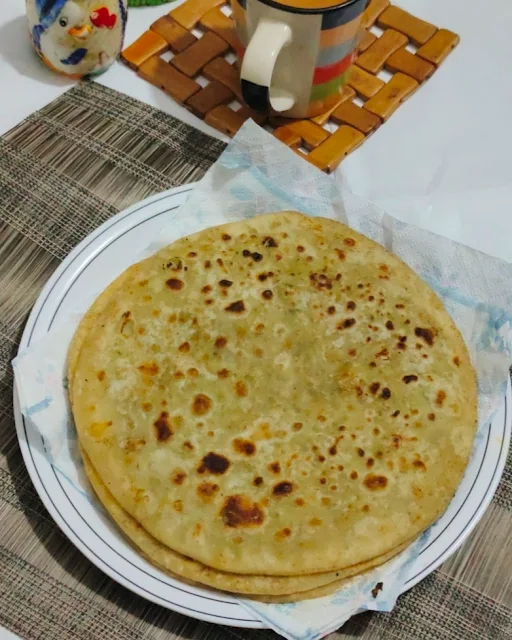
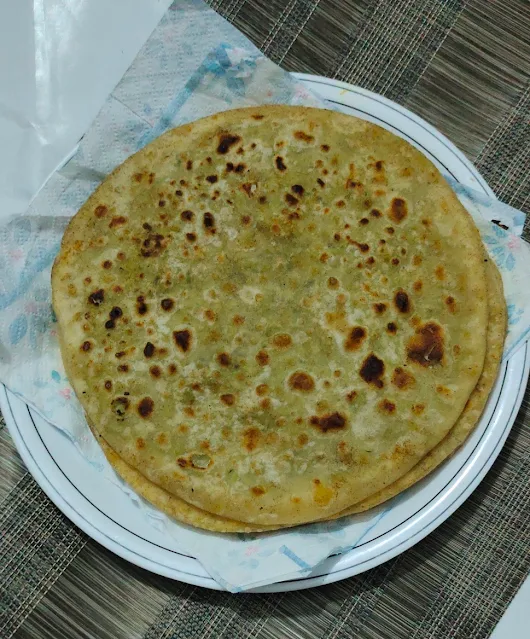
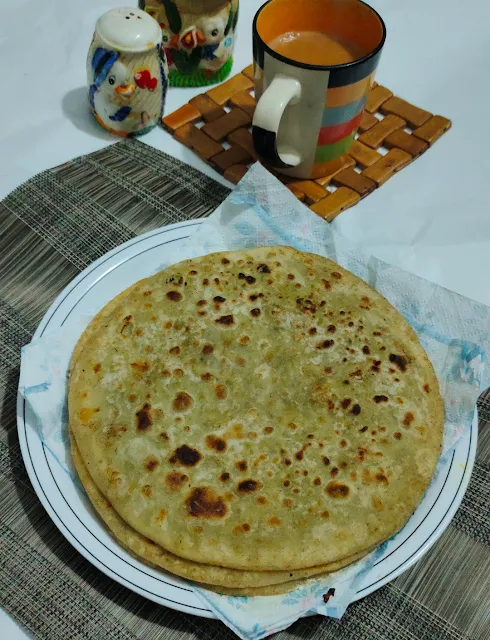
Matar Paratha Recipe || Green Peas Paratha || How to Make Matar Paratha with step-by-step photos and video

Matar Paratha, also known as Green Peas Paratha, is a crispy, delicious flatbread stuffed with spiced mashed green peas. This matar paratha can be the best choice for breakfast and lunch. But it should be avoided during dinner to prevent gas trouble.

Green Peas Paratha mainly belongs to Indian cuisine, while in Pakistan, I haven’t seen this stuffed paratha at home. However, a variety of foods are adopted from neighboring countries, especially China, India than from other countries in Asia. 

                                                         
green peas paratha


My Latest Matar Paratha Video:


I am also a big fan of Indian snacks and meals.like PAV BHAJI,VADA PAV,BAIGAN BHARTA,MATAR MASALA

GOBI VADA PAV KEEMA, whatever names above are mentioned have been posted on my blog already, whereas some remain to cook like dosa masala, idli, Etc   

For now, I am preparing posts on green pea paratha. There are many variations of making matar paratha. Here I am sharing a simple family recipe. This is the simplest version of matar ka paratha made with a few basic spices. 

A pile of spices can’t give you the surety of making delicious food, while simple and fewer ingredients make your food delicious and light. More spices, oil, and ghee mean acidity, gastric problems, and heaviness.

                                          
how to make matar paratha

Recipe Notes:

Using fresh peas in a green peas paratha enhances the taste and flavor of the recipe more than frozen peas. You might wonder why I'm discussing frozen peas while recommending fresh ones. The truth is, the peas I used in my recipe were purchased just two days ago during my trip to the market. After buying them, I peeled them, so you could say they are fresh enough! ๐Ÿ˜Š If you only have frozen peas available, feel free to use those.


This stuffed paratha is delicious, and I'm confident that everyone will love it. I used all-purpose flour to make the matar paratha extra crispy and tasty, but if you prefer or have digestive concerns, you can opt for whole wheat flour instead.


I recommend using ghee for making the matar paratha, as it adds incredible flavor. However, I used olive oil this time because I'm on a diet. If you don't have any health restrictions, definitely consider using ghee for an even more delicious paratha!


green peas paratha

To Make Puffy green peas paratha, knead the dough medium soft and firm. If you knead the dough too soft, the matar paratha will tear, and the matar stuffing will come out. And if you knead the dough too hard, it will be hard to roll out and will make hard paratha.  

If you have tried this Matar Paratha, don’t forget to rate the recipe. You can also follow me on social media to see what’s latest in my kitchen!

Facebook 

Instagram

Pinterest

Youtube

youtube


Like Our Videos? Then do follow and subscribe to us on YouTube to get the latest Recipe Video updates.


green peas paratha

How to make Matar Paratha?

Peel the green peas, chopped green chilies, and ginger.


preparation for matar paratha

Combine the flour, oil, and salt, mix, and start kneading the dough by adding water little by little to a medium-soft dough. 


green peas paratha

Cover and keep aside.


how to make matar paratha

Take a pan, add 1 tbsp olive oil, and heat it. Put cumin seeds and let them crackle for a minute, then add chopped ginger and green chilies. Sautee it for a minute. 
                                           
matar paratha recipe

Once the aroma arises, add the onion and sautรฉ it with spices for 2 minutes or until the onion gets soft. 
                                          
green peas paratha recipe

Add frozen/fresh green peas and keep stirring on a low-medium flame.
                                                       
how to make matar paratha

Then add salt and red chili powder, then mix them well. Cover it and allow to cook in steam (don’t add water)

Remove the cover and add lemon juice, then mix well and cover it. Give it another 2-3 minutes, more now that the stuffing is ready. Leave it aside for a bit to cool down.


matar paratha recipe


Grind the pea masala to a fine paste because coarsely ground peas may tear the paratha while rolling.                                          

green peas paratha

Knead the dough again for a minute and divide the dough into equal portions. Flatten each portion between the palm and shape it into a bowl, then place 1-2 tbsp stuffing in it. 
                                   
matar ka paratha
                                                   

Gather it for all sides and seal it firmly in the center. Gently press the stuffed dough ball and keep it aside. Work on all dough portions as before 


peas paratha

Dust over the rolling board or working surface, then carefully begin to roll around 5-6 inches in a round shape. Rolled paratha should be ½ inch thick; don’t roll thin, otherwise, it becomes hard and won’t be puffy. 


matar paratha recipe

Preheat the tawa/griddle on high flame, then put the rolled paratha on it. Cook the paratha on a medium-high flame once bubbles form on the roti. Flip it and drizzle the oil/ghee over the paratha (butter also can be used)


green peas paratha

Spread the oil with the help of a spatula and keep rotating and flipping the paratha over the tawa to cook evenly until nicely golden brown in color and puffy. 


green peas paratha
how to make matar paratha

Once golden, take it off the tawa and transfer it onto the serving plate


green peas paratha

Serve hot matar paratha with MASALA CHAI or DOODH PATTI.      


Gobi Paratha Recipe


Gobi Paratha recipe with step by step photos


Gobi Paratha | Stuffed Flatbread || How to make Gobi Paratha with step-by-step photos and video

Gobi Paratha is a type of paratha or parantha (flatbread), originating from the Indian subcontinent, that is stuffed with flavored cauliflower and vegetables.it is a popular paratha along with mooli paratha and dal paratha

Gobi paratha is often made for breakfast in Punjabi homes, but I made it for dinner, I first learned how to make gobi paratha from my friend, I know how to make aloo paratha but not gobi paratha
                   
gobi-ka-paratha


I always thought making gobi paratha is difficult and honestly never ever tried to make it, Hopefully, you would like my effort kindly give me feedback, unfortunately, 
I didn’t get any signal feedback yet from all my readers even then I didn’t leave my efforts regarding sharing cooking recipes,


My Latest Video Gobi Paratha:


You Might Like this:


To prepare this recipe first we will prepare dough for parathas take a large size bowl put fine atta along with salt as required mix well, add water as required, knead the fine flour with water as a smooth dough, cover, and keep aside for 20-30 minutes


put-fine-flour-in-the-bowl
knead-dough-as-a-smooth-dough


Cut and rinse the cauliflower, and then grate the gobi pieces using a fine hand grater, keep the grated cauliflower in a bowl/plate


rinse-the-culiflower
grate-the-gobi


Rinse and chop fresh green and red chilies, rinse and chop ginger, freshly squeezed lemon juice


green-red-chillies-and-lemon

If you have tried this Gobi Paratha then don’t forget to rate the recipe. You can also follow me on social media 

Facebook

Instagram

Pinterest

Youtube


Like Our Videos? Then do follow and subscribe to us on YouTube to get the latest Recipe Video updates.


Pour oil and heat it then add cumin seeds, let it crackle for a few seconds then add ginger and green chilies to the pan


pour-oil-and-heat
put-ginger-and-green-chillies

Saute them for 2 minutes on medium flame, then add grated gobi and mix well

saute-ginger-and-green-chillies
add-grated-gobi

Start to now add dried spices powder, stir to mix well on medium-low heat

add-dried-spice-powder-to-the-gobi
stir-to-combine-gobi-mixture

Keep stirring for 5 minutes, cover the lid then cook gobi on low-medium heat

keep-stirring-for-5-minutes
cover-the-lid-and-cook-for-5-minutes-gobi-mixture

Remove the lid and add lemon juice and coriander leaves, mix well further then let it cool down completely

put-coriander-leaves-and-lemon-juice
mix-well


Divide equal balls of the dough, take 2 balls, and flatten them between your palm


divide-equal-ball-of-the-dough
flatten-dough-balls-between-your-palm

Roll the 2 dough balls in equal size, and apply ghee over one of the rolled discs 


Roll-the-dough-balls
apply-ghee-over-the-rolled-disc

Sprinkle some flour dust then spread gobi mixture, cover with other rolled disc

spread-gobi-mixture-on-rolled-disc
cover-with-the-other-rolled-disc

Slightly press and seal edges very well

press-and-seal-edges


Heat the Tawa/skillet or flat pan and put gobi paratha on hot Tawa, cook the paratha about 1/4, when the bottom side is cooked flip the gobi paratha and apply ghee on the cooked side

heat-the-tawa-and-place-gobi-paratha-over-hot-tawa
apply-ghee-on-gobi-paratha

Flip the side apply ghee and further cook until a golden brownish color appears over the gobi paratha, make sure the gobi paratha is cooked evenly and well golden browned, and repeat the same process with all remaining parathas

cook-paratha
gobi-paratha-is-ready

Gobi Paratha is ready to hot-serve 


Serve gobi paratha hot with pickles or raitagarlic chutney 


Followers

Follow

//o?$("#menu-wrapper").css({position:"fixed",top:0,left:0,right:0,"z-index":99}):$("#menu-wrapper").css({position:"relative"})};n(),$(window).scroll(function(){n()})}); // Menu 2 $(document).ready(function(){var str=location.href.toLowerCase();$('.mainin-nav ul li a').each(function(){if(str.indexOf(this.href.toLowerCase())>-1){$("li.highlight").removeClass("highlight");$(this).parent().addClass("highlight")}})}) $(function(){var pull=$('#pull');menu=$('.mainin-nav ul');menuHeight=menu.height();$(pull).on('click',function(e){e.preventDefault();menu.slideToggle()});$(window).resize(function(){var w=$(window).width();if(w>320&&menu.is(':hidden')){menu.removeAttr('style')}})}); // Back to Top $(function(){$("#back-to-top").backToTop()}); !function(n){n.fn.backToTop=function(o){var c=n(this);c.hide().click(function(){n("body, html").animate({scrollTop:"0px"})});var i=n(window);return i.scroll(function(){i.scrollTop()>0?c.fadeIn():c.fadeOut()}),this}}(jQuery); // Tab Menu !function(a){"use strict";var b=function(b,c){var d=this;d.element=b,d.$element=a(b),d.tabs=d.$element.children(),d.options=a.extend({},a.fn.mtabs.defaults,c),d.current_tab=0,d.init()};b.prototype={init:function(){var a=this;a.tabs.length&&(a.build(),a.buildTabMenu())},build:function(){var b=this,c=b.options,d=c.tab_text_el,e=c.container_class;b.tab_names=[],b.$wrapper=b.$element.wrapInner('
').find("."+e),b.tabs.wrapAll('
'),b.tabs.each(function(c,e){var f,g=a(e),h=d;f=g.find(h).filter(":first").hide().text(),b.tab_names.push(f)}),a.isFunction(c.onReady)&&c.onReady.call(b.element)},buildTabMenu:function(){for(var b,c=this,d=c.options,e=d.tabsmenu_el,f=c.tab_names,g="<"+e+' class="'+d.tabsmenu_class+'">',h=0,i=f.length,j=function(){var a=arguments;return d.tmpl.tabsmenu_tab.replace(/\{[0-9]\}/g,function(b){var c=Number(b.replace(/\D/g,""));return a[c]||""})};i>h;h++)g+=j(h+1,f[h]);g+="",c.$tabs_menu=a(g).prependTo(c.$wrapper),b=c.$tabs_menu.find(":first")[0].nodeName.toLowerCase(),c.$tabs_menu.on("click",b,function(b){var d=a(this),e=d.index();c.show(e),b.preventDefault()}).find(":first").trigger("click")},show:function(b){var c=this,d=c.options,e=d.active_tab_class;c.tabs.hide().filter(":eq("+b+")").show(),c.$tabs_menu.children().removeClass(e).filter(":eq("+b+")").addClass(e),a.isFunction(d.onTabSelect)&&b!==c.current_tab&&d.onTabSelect.call(c.element,b),c.current_tab=b},destroy:function(){var a=this,b=a.options.tab_text_el;a.$tabs_menu.remove(),a.tabs.unwrap().unwrap(),a.tabs.removeAttr("style"),a.tabs.children(b+":first").removeAttr("style"),a.$element.removeData("mtabs")}},a.fn.mtabs=function(c,d){return this.each(function(){var e,f=a(this),g=f.data("mtabs");e="object"==typeof c&&c,g||f.data("mtabs",g=new b(this,e)),"string"==typeof c&&g[c](d)})},a.fn.mtabs.defaults={container_class:"tabs",tabs_container_class:"tab-contents",active_tab_class:"active-tab",tab_text_el:"h1, h2, h3, h4, h5, h6",tabsmenu_class:"tabs-menu",tabsmenu_el:"ul",tmpl:{tabsmenu_tab:'
  • {1}
  • '},onTabSelect:null}}(window.jQuery,window,document); //]]>